
To create stunning DIY Venetian or Marmorino plaster finishes, start with properly prepping your wall to make certain smoothness and adhesion. Use tools like trowels, sponges, or brushes to apply thin, overlapping layers, building texture and depth as you go. Experiment with colors and finishes, polishing each layer for a polished look or leaving a matte texture. Patience is key—proper drying and sealing will help preserve your work. Keep going, and you’ll master beautiful, personalized walls.
Key Takeaways
- Prepare a smooth, clean surface to ensure proper adhesion and a flawless finish for Venetian or Marmorino plaster.
- Apply thin, overlapping coats with a trowel or spatula, allowing each layer to dry completely before adding the next.
- Use specialized tools like sponges or brushes to create varied textures and depth in your plaster finish.
- Mix pigments into the plaster before application for customized colors and experiment with blending for organic effects.
- Seal the finished surface with a protective sealant to preserve the look, enhance durability, and simplify maintenance.
Are you looking to add a professional touch to your walls without hiring a pro? Diving into DIY plaster finishes like Venetian and Marmorino can completely transform your space, giving it a sophisticated, textured look. The key to achieving stunning results lies in mastering texture techniques and understanding how to apply color effectively. With a bit of patience and the right tools, you can create walls that resemble those found in high-end interiors.
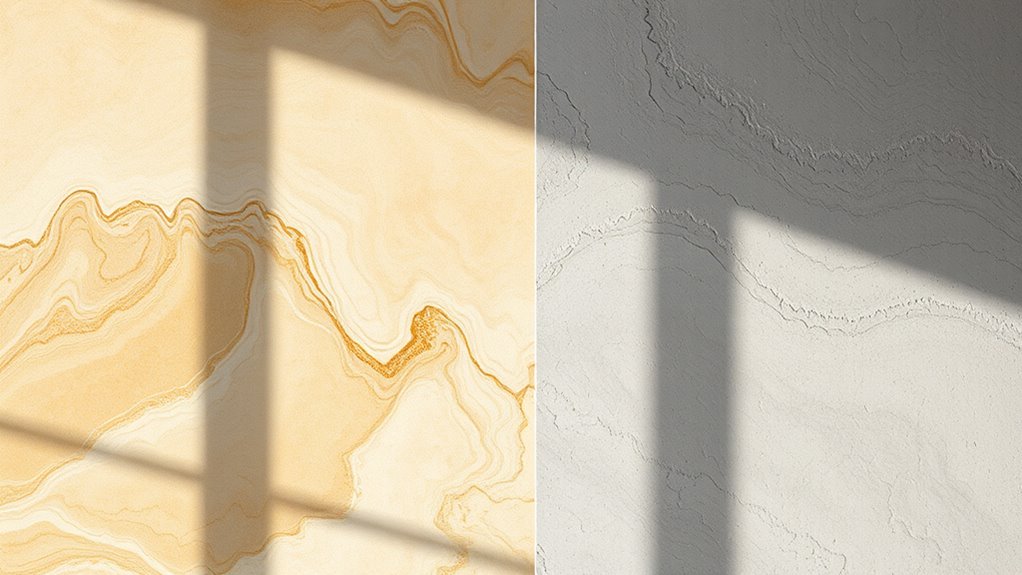
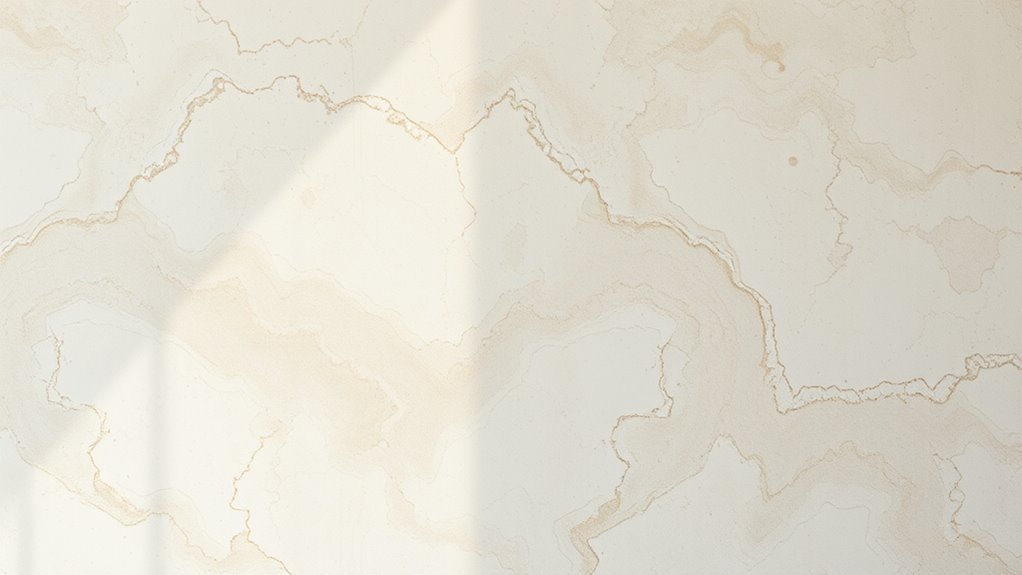
Start by preparing your surface thoroughly. Make sure your wall is smooth, clean, and free of dust or grease. This step is essential because the success of your plaster finish depends on a solid base. Once prepped, you’ll begin the process of applying the plaster. For Venetian or Marmorino finishes, you typically use a trowel or spatula to spread the plaster in thin, even layers. As you work, focus on developing texture techniques that add depth and character. For Venetian plaster, you’ll often use a series of overlapping, thin coats, polishing each layer to create a sleek, marble-like surface. Marmorino, on the other hand, tends to have a more textured, matte finish, so you might incorporate different tools like sponges or brushes to add variety.
When it comes to color application, your choices can dramatically influence the final look. These plaster finishes are often applied in neutral tones, but you can also add pigments to customize your color palette. Mix pigments thoroughly into your plaster before application to guarantee consistent color. During the application process, you can also experiment with blending shades or adding subtle variations to enhance the natural, organic feel of the plaster. Remember to work in small sections, blending edges seamlessly for a uniform appearance. After you’ve completed the plaster layers, some techniques involve burnishing or polishing to bring out the vibrancy and richness of the color, especially in Venetian plaster.
Patience is vital as you build up layers and refine your texture techniques. Allow each coat to dry thoroughly before applying the next, which can take several hours depending on humidity and temperature. Once you’re satisfied with the texture and color application, finish with a protective sealant to preserve the look and make cleaning easier. With practice, you’ll develop a keen eye for detail, enabling you to craft walls that mimic professional finishes—rich in texture, vibrant in color, and uniquely yours. This DIY approach not only saves money but also gives you the satisfaction of creating a beautiful, personalized space.
Top picks for "plaster finish venetian"
Open Amazon search results for this keyword.
As an affiliate, we earn on qualifying purchases.
Frequently Asked Questions
What Tools Are Essential for Applying Venetian and Marmorino Plaster?
To apply Venetian and Marmorino plaster, you’ll need essential tools like a stainless steel trowel for smooth trowel techniques and to work the plaster evenly. A hawk helps hold your mix, while sponges or brushes are useful for finishing textures. Don’t forget color pigments to customize your look. With these tools, you can achieve professional results, blending techniques and pigments seamlessly for a stunning, durable finish.
How Long Does Each Plaster Finish Typically Take to Cure?
Venetian and Marmorino plaster typically take about 7 to 14 days to cure, depending on factors like humidity and thickness. During this curing period, you should avoid heavy cleaning or impact to prevent damage. The application duration varies; Venetian plaster may take several coats and longer drying times, while Marmorino’s application can be quicker. Proper curing guarantees a durable, beautiful finish that lasts.
Can These Plaster Techniques Be Applied Outdoors?
They say, “A stitch in time saves nine,” and it applies here too. Yes, you can apply Venetian and Marmorino plasters outdoors, but focus on outdoor durability and weather resistance. Use specially formulated products designed for exterior use, guarantee proper sealing, and consider climate factors. Proper application and finishing methods will help these finishes withstand the elements, maintaining their beauty and integrity over time.
Are There Eco-Friendly or Low-Voc Plaster Options Available?
Yes, eco-friendly options and low-VOC plasters are available for your projects. You can choose plasters made from natural, sustainable materials that emit fewer volatile organic compounds, making them safer for indoor air quality and the environment. These low-VOC plasters perform well and come in various finishes, allowing you to achieve beautiful results while reducing your ecological footprint. Look for certified products to confirm you’re selecting genuinely eco-conscious materials.
How Do I Repair Damages or Cracks in Venetian or Marmorino Plaster?
Did you know that properly maintained plaster can last over 50 years? To repair cracks in Venetian or Marmorino plaster, start by cleaning the damaged area and applying a bonding agent. Use a thin layer of matching plaster to fill cracks, then gently sand once dry. To prevent future cracks, control moisture and avoid sudden temperature changes, ensuring long-lasting beauty and durability through effective repair techniques.
Conclusion
Now that you’ve learned how to create stunning Venetian and Marmorino finishes, you’re ready to transform your space with a touch of old-world charm. Don’t forget, patience and practice are your best allies—think of it as your own Renaissance masterpiece in the making. With a bit of elbow grease, you’ll impress even the most discerning art connoisseurs. So go ahead, channel your inner Michelangelo and turn your walls into timeless works of art.

Born in Dubai to Pakistani parents, Aisha deeply understands Middle Eastern and South Asian luxury markets. She excels in forging strategic partnerships with top-tier luxury brands worldwide, fostering cross-cultural collaborations that enhance our global presence.