
Before pouring, double-check your formwork and reinforcement placement to guarantee everything is secure, aligned, and free of damage. Verify embedded items and conduits are correctly positioned and accessible. Confirm slopes and drainage are proper to prevent water pooling. Review weather forecasts and prepare protective measures if needed. Ensure all materials meet specs, and perform slump tests for consistency. Conduct a final walkthrough to address last-minute issues—continuing further can help you master every detail for a flawless pour.
Key Takeaways
- Verify formwork, reinforcement, embedded items, and site conditions are correctly installed and ready for pouring.
- Conduct weather assessments and prepare protective measures to prevent delays or damage.
- Confirm proper slope and drainage to avoid water pooling and structural issues.
- Ensure safety protocols, accessible pathways, and communication plans are in place for a safe pour.
- Check material availability, mix consistency, and compliance to prevent delays and rework.
concrete formwork support braces
As an affiliate, we earn on qualifying purchases.
As an affiliate, we earn on qualifying purchases.
Confirm Formwork and Reinforcement Placement

Before pouring concrete, you need to verify that the formwork and reinforcement are correctly placed. Check that the formwork is securely supported, aligned, and free of damage or gaps, ensuring it matches the design specifications. Proper formwork ensures the concrete takes the right shape and prevents leaks. Next, examine the reinforcement bars—make sure they are correctly positioned according to the structural drawings. Confirm they are clean, free of rust or debris, and properly tied with the right spacing and cover. Reinforcement must be free of excessive movement during pouring. Double-check that all bars are securely fastened and properly supported to avoid displacement. Taking these steps prevents structural issues and costly rework, setting a solid foundation for a successful pour. Additionally, verify that the reinforcement has the appropriate spacing and cover to ensure proper concrete bonding and durability.
rebar tie wire and tools
As an affiliate, we earn on qualifying purchases.
As an affiliate, we earn on qualifying purchases.
Check for Proper Sloping and Drainage
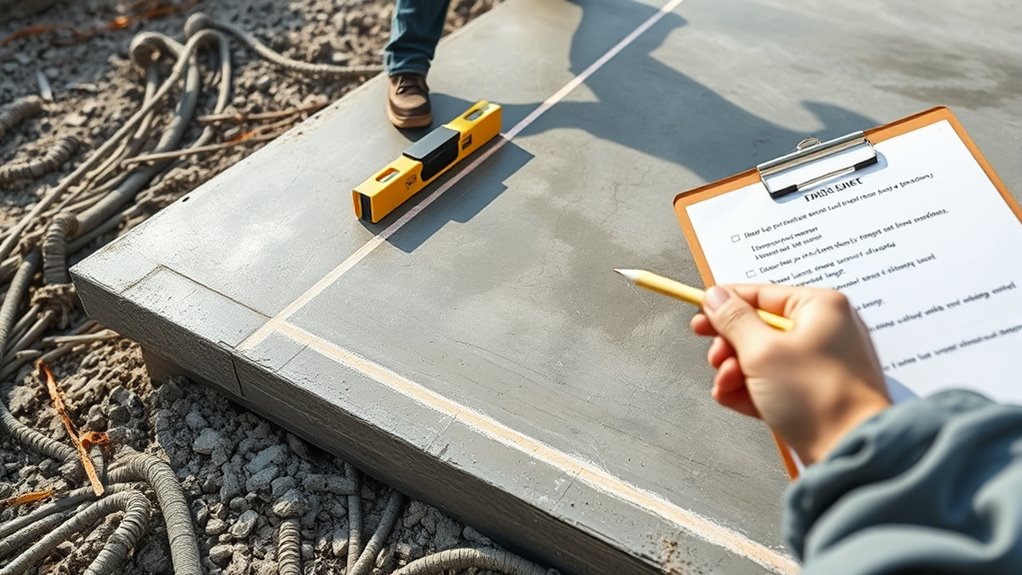
Ensuring proper sloping and drainage is essential for preventing water accumulation and protecting the integrity of the structure. You should double-check that all surfaces, especially flat areas like slabs and walkways, have the correct slope according to the plans—typically 1/4 inch per foot. Use a level or a transit to confirm the slope’s consistency. Look for areas where water might pool or flow improperly, and make adjustments if necessary. Proper drainage directs water away from foundations and walls, reducing the risk of leaks or structural damage. Also, ensure that drainage channels and weep holes are clear and correctly positioned. Conducting a drainage assessment before pouring helps identify potential issues early and prevents costly rework and long-term problems caused by poor water management.
concrete slump test kit
As an affiliate, we earn on qualifying purchases.
As an affiliate, we earn on qualifying purchases.
Verify Embedded Items and Embedded Conduits

Have you confirmed that all embedded items and conduits are correctly positioned and clearly visible? Double-check their locations against the drawings and specifications. Make certain conduits aren’t kinked, crushed, or misaligned, which could cause issues later. Verify that embedded items like reinforcement, anchors, or embedded plates are in the right spots and fully accessible for future connections or inspections. Look for any potential obstructions that might interfere with pouring or curing. Confirm that conduit openings are properly capped or sealed to prevent debris from entering. Ensure all embedded components are free of damage or corrosion. Additionally, consider how AI Disrupts Traditional Drug Development could influence future construction standards for medical facilities, emphasizing the importance of precision and quality control. Address any discrepancies immediately, as missing or misplaced items can lead to costly rework or structural problems. Taking these steps now saves time and prevents headaches during the construction process.

KEZERS 36X Transit Level,Automatic Optical Survey Level,High Precision Auto Level,Self-Leveling Tool for Builders,Waterproof/Height/Distance/Angle Measurement – KL-36X
Professional Transit Level for Builders:KEZERS KL-36X automatic optical level featuring a powerful 36X magnification lens and 36mm large…
As an affiliate, we earn on qualifying purchases.
As an affiliate, we earn on qualifying purchases.
Ensure Adequate Access and Safety Measures
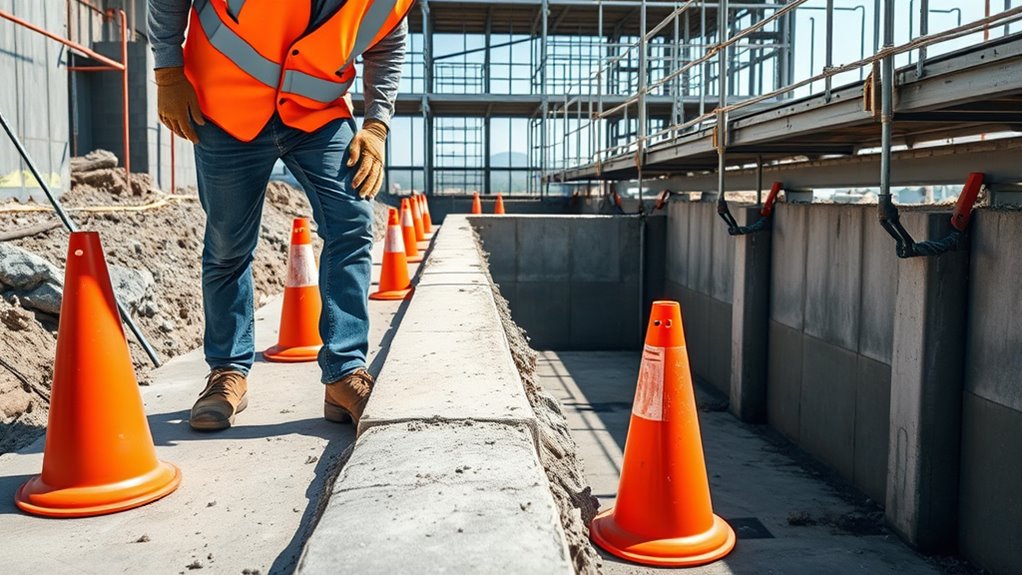
Make sure pathways and entrances are clear so everyone can move safely around the site. Confirm that safety equipment, like helmets and barriers, is available and in good condition. Taking these steps helps prevent accidents and keeps the work area secure. Additionally, consider effective communication techniques to coordinate activities and respond promptly to any safety concerns.
Clear Pathways and Entrances
Are pathways and entrances wide and unobstructed enough for safe access? Before pouring, double-check that all routes to the site are clear of obstacles, debris, or equipment. Ensure there’s enough space for trucks, mixers, and personnel to move freely without risking accidents. Remove any temporary barriers or unnecessary tools blocking access points. Verify that entrances are well-lit and free from mud or debris that could cause slips or falls. Clear pathways also help speed up workflow and prevent delays. Make sure ground surfaces are stable and even, particularly near entry points, to support heavy machinery and foot traffic. Additionally, inspecting portable camping toilets to ensure they are properly positioned and accessible can prevent logistical issues during the pour. Taking these small steps now can prevent accidents, injuries, and rework once the pour begins. Safety and smooth operations depend on accessible, unobstructed pathways.
Confirm Safety Equipment Availability
Before starting the pour, it’s important to verify that all safety equipment is in place and accessible. Check that fire extinguishers are nearby and fully charged, and confirm that first aid kits are stocked and within reach. Make sure personal protective equipment (PPE) like helmets, gloves, and eye protection are available for everyone on-site. Inspect safety barriers and warning signs to ensure they’re correctly positioned. Confirm that communication devices, such as radios or phones, are functioning properly for quick coordination. Don’t forget to verify that emergency exits are clear and accessible. Reviewing this safety equipment ensures you’re prepared for any incidents, minimizes risks, and maintains a safe work environment throughout the pour. Additionally, understanding electric dirt bike horsepower can help in assessing the safety and handling of equipment used on-site.
Review Material Availability and Mix Specifications

Before pouring, double-check that all materials are in stock and ready to go. Confirm that the mix specifications match project requirements and haven’t changed. Ensuring material availability and mix consistency helps prevent delays and quality issues during the pour. Additionally, reviewing material management practices can further streamline the process and mitigate potential problems.
Material Stock Verification
Verifying material stock involves checking that all necessary materials are available in the correct quantities and meet specified mix requirements. You should confirm that enough cement, aggregates, and admixtures are on hand to complete the pour without interruptions. Inspect the delivery tickets and inventory records to ensure no shortages or discrepancies. Confirm that the materials meet the project’s specified mix design, including slump, water-cement ratio, and aggregate sizes. Double-check the batch tickets or certificates of compliance for quality assurance. If anything is missing or doesn’t meet the standards, address it immediately to prevent delays or rework. Accurate stock verification ensures you have the right materials ready, reducing the risk of work stoppages and maintaining the integrity of the concrete pour. Additionally, understanding AP Tuning techniques can help optimize the overall process and prevent operational issues.
Mix Consistency Confirmation
To guarantee the concrete mix will perform as expected, you need to confirm that the materials available match the specified mix design. This ensures the mix’s workability, strength, and durability. First, verify the cement, aggregates, and admixtures meet the project specifications. Second, check the water-cement ratio aligns with the mix design to prevent weaknesses. Third, confirm the batch proportions are accurate by reviewing the mix tickets. Finally, perform a slump test to assess consistency and workability on-site. Conducting a HEPA filtration test can also help ensure that any airborne contaminants during mixing are effectively controlled, maintaining a safe environment. By systematically reviewing these elements, you prevent discrepancies that could cause rework or structural issues. Ensuring the mix’s integrity before pouring saves time and resources, leading to a successful, high-quality finished project.
Inspect Weather Conditions and Prepare for Delays

Monitoring weather conditions is crucial to ensuring your pour goes smoothly. Check the forecast closely before starting, paying attention to rain, wind, temperature, and humidity. Sudden changes can delay or compromise the pour, so stay updated with real-time weather alerts. If rain is forecasted, consider postponing or preparing protective measures like tarps or shields. Extreme temperatures can affect curing and strength, so plan accordingly if conditions are hot or cold. Wind can cause uneven placement or safety hazards, so monitor wind speeds and take precautions if necessary. Preparing for potential delays means having a backup plan, such as adjusting your schedule or arranging additional resources. Being proactive about weather ensures you avoid rushing or rework caused by unforeseen conditions. Additionally, understanding the impact of weather conditions on concrete curing can help you make informed decisions and prevent rework.
Conduct a Final Walkthrough and Documentation
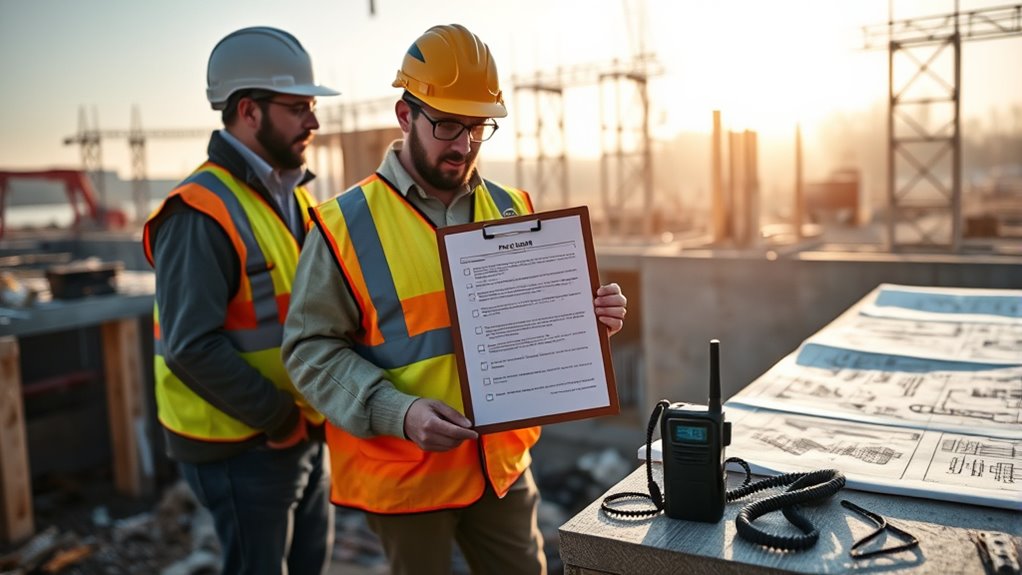
Before pouring begins, take a final walk through the site to guarantee everything is in place and ready. This step ensures no details are overlooked and helps catch potential issues before they become costly problems. During your walkthrough, verify that all formwork is secure, reinforcement is correctly positioned, and the site is clean and free of debris. Document any discrepancies or last-minute adjustments with photos and notes for future reference. This documentation provides a clear record of the current state, reducing confusion and liability.
Perform a final walk-through to confirm everything is ready, secure, and free of debris before pouring begins.
- Confirm formwork and reinforcement are properly installed.
- Check for any debris or obstructions in the pour area.
- Record existing conditions with detailed notes and photos.
- Communicate findings with your team to address issues immediately.
Frequently Asked Questions
How Early Should the Pre-Pour Checklist Be Completed?
You should complete the pre-pour checklist at least 24 hours before pouring concrete. This gives you enough time to verify all details, fix any issues, and coordinate with suppliers and team members. Rushing through it increases the risk of overlooking critical steps, leading to rework. By completing the checklist early, you guarantee everything is on track, minimizing delays and ensuring a smooth, successful pour.
Who Is Responsible for Final Approval Before Pouring?
Like a captain steering a ship through stormy seas, you’re responsible for the final approval before pouring. You need to double-check that all checklist items are completed, specifications are met, and safety protocols are followed. It’s your role to guarantee everything aligns perfectly before proceeding. Trust your expertise, review all details thoroughly, and only give the green light once you’re confident the site is ready to prevent rework and ensure a successful pour.
What Are Common Signs of Formwork Instability?
You should look for signs like bulging or deflection in the formwork, which indicate instability. Cracks or unusual movement when applying pressure also suggest that the forms might be compromised. Keep an eye on misalignment or uneven surfaces, as these can point to shifting supports. If you notice any of these issues, stop the pour immediately and address the formwork’s stability to prevent future rework or structural problems.
How to Handle Unexpected Weather Changes During Pouring?
While some might think waiting out a storm is best, swift action is essential. You should immediately pause the pour if severe weather hits, especially high winds or rain, to prevent compromising the concrete. Cover exposed surfaces with tarps, and make sure you have proper drainage to avoid water pooling. Once the weather clears, inspect the formwork, re-temper the mixture if needed, and resume pouring carefully to maintain quality.
What Are the Troubleshooting Steps for Embedded Item Misalignment?
When you notice embedded item misalignment, stop the pour immediately to prevent further issues. Check the placement of the embedded items and verify their position against your plans. If necessary, carefully adjust or reposition them using appropriate tools. Document the misalignment, take photos for reference, and inform your supervisor. Once corrected, resume pouring with extra caution, ensuring the embedded items stay correctly aligned throughout the process.
Conclusion
Think of your pre-pour checklist as the final brushstroke on a masterpiece—you want every detail perfect before the paint dries. I once saw a project delayed because a small detail was overlooked, like missing a single puzzle piece. When you double-check those last-minute items, you’re ensuring the foundation is solid, preventing rework and costly mistakes. Trust me, a thorough pre-pour prep is your best safeguard against surprises, turning a potential setback into a smooth, successful pour.

Chloe hails from Paris, France, with extensive experience organizing high-profile events and soirées. She ensures that A Luxury Lifestyle hosts unforgettable events embody elegance and exclusivity, strengthening community ties and brand prestige. Chloe’s meticulous planning guarantees flawless and memorable gatherings.