
To start your home pottery studio, pick suitable clay types like earthenware, stoneware, or porcelain based on your skill level and projects. Designate specific areas for wedging, shaping, drying, and glazing to streamline your process. Keep tools organized and store clay in airtight containers to prevent drying out. guarantee proper lighting and good workspace layout for safety and precision. As you grow, gradually expand your supplies and adapt your setup—it’s all about creating an inspiring space to develop your craft.
Key Takeaways
- Choose suitable clay types based on your skill level and desired pottery style, considering firing temperature and glaze compatibility.
- Designate specific studio zones for wedging, shaping, drying, and glazing to streamline your workflow.
- Organize tools, supplies, and storage with labels and accessible shelving to keep your workspace tidy and efficient.
- Ensure proper lighting and safety measures, including regular cleaning and kiln maintenance, to create a safe working environment.
- Follow a consistent process from clay selection to firing and glazing, maintaining flexibility to adapt as your skills grow.
Starting a home pottery studio is an exciting way to turn your passion for clay into a functional and creative space right in your own house. When you begin setting up, one of the first things you’ll want to focus on is clay selection. With so many types available—earthenware, stoneware, porcelain—you need to choose the one that best fits your style and skill level. Consider what you want to create; if you’re aiming for durable, everyday ware, stoneware might be your best bet. If you prefer delicate, refined pieces, porcelain could be ideal. Think about the firing temperature and the glazes you plan to use, as these will influence your choice. Having a variety of clays on hand can be helpful, but start with one or two to keep your workspace manageable. As you experiment and gain experience, you can expand your collection.
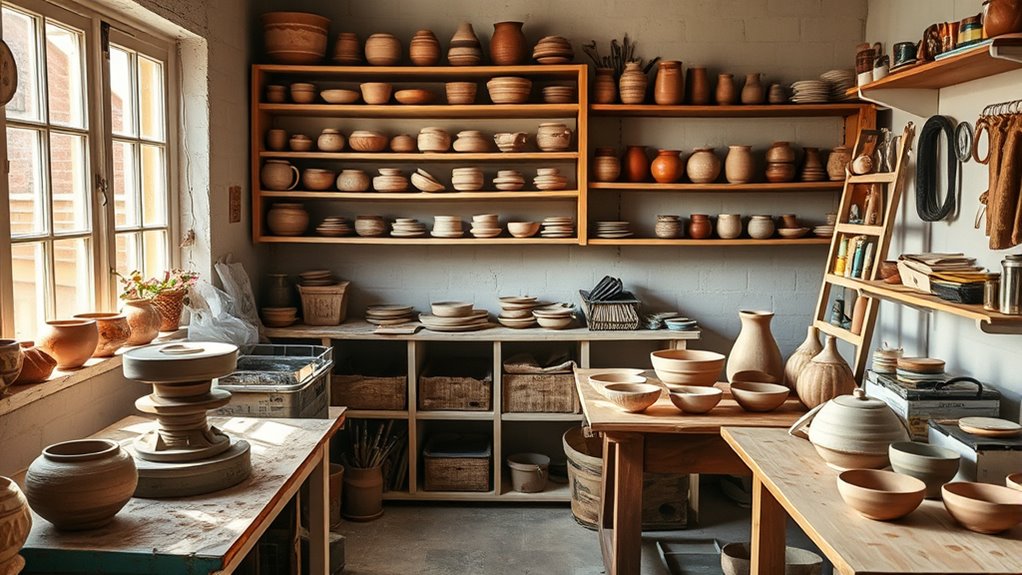
Once you’ve selected your clay, paying attention to studio organization becomes crucial. A well-organized space helps you work efficiently and keeps your materials in good condition. Designate specific areas for wedging, shaping, drying, and glazing. Keep your clay stored in airtight containers to prevent it from drying out or becoming contaminated. Use shelves or storage bins to hold your tools, brushes, and glazes, making everything easy to find and access. Label your supplies clearly so you don’t waste time searching during your creative sessions. Incorporate a worktable that’s sturdy and at a comfortable height, and make sure it’s free of clutter. Good lighting is essential, especially around your work surface, to see details clearly and work precisely. If space allows, create dedicated zones for different stages of your pottery process—this not only improves workflow but also helps keep your studio neat and inviting. Additionally, selecting appropriate lighting can significantly impact your ability to see fine details and colors accurately during glazing and decorating.
Another key aspect of studio organization is establishing routines for cleaning and maintenance. Keep your tools and equipment sanitized, and regularly check your kiln for safety and efficiency. By maintaining a tidy studio, you reduce the risk of accidents and ensure your tools last longer. As your skills grow, your studio might evolve; so, stay flexible and reorganize as needed. Keep a clear workflow in mind: from clay selection, to forming, to decorating, and finally to firing and glazing. This will keep your creative process smooth and enjoyable. Ultimately, a well-organized studio tailored to your needs enhances your craftsmanship and inspires you to experiment more confidently. With careful clay selection and thoughtful studio organization, you’ll create a space that nurtures your artistic growth and makes every session productive and fun.
Frequently Asked Questions
What Is the Best Space Size for a Home Pottery Studio?
You should aim for at least 100 to 150 square feet for a home pottery studio, giving you enough room to work comfortably. Make sure the space has good studio lighting to see details clearly and consider smart storage solutions to keep your tools and clay organized. A larger space allows for a wheel, worktables, and drying racks, making your creative process smoother without feeling cramped.
How Much Does It Cost to Set up a Home Pottery Studio?
Setting up a home pottery studio costs like planting a seed—you’ll need to plan carefully. Expect to spend between $2,000 and $10,000, depending on equipment quality and space. Your cost estimation includes a kiln, wheel, worktables, and supplies. By doing budget planning early, you can prioritize essentials and avoid surprises. Focus on quality tools to ensure smooth creation and long-lasting results in your creative space.
What Safety Equipment Is Essential for Pottery at Home?
You need vital safety equipment like protective gear, including gloves and a dust mask, to shield your skin and lungs from clay dust and chemicals. A fire extinguisher is essential for fire safety, especially near kilns or heating elements. Keep your workspace well-ventilated and have smoke detectors installed. Always prioritize safety to prevent accidents and guarantee a safe, enjoyable pottery experience at home.
How Do I Manage Kiln Fumes and Ventilation Safely?
You should install a proper ventilation system with fume extraction to manage kiln fumes safely. Ensure your vent is positioned to directly capture fumes as they exit the kiln, and regularly check and maintain the system for peak performance. Use exhaust fans or air purifiers with activated carbon filters, and keep the workspace well-ventilated during firing. Always follow manufacturer instructions and local safety regulations to protect your health.
Are There Specific Electrical Requirements for Pottery Equipment?
You need to get your electrical wiring and circuit breaker requirements right from the get-go, or you’ll be asking for trouble. Pottery equipment, especially kilns and large tools, often demands dedicated circuits to handle the load safely. Make sure your wiring complies with local electrical codes, and install a circuit breaker capable of handling the equipment’s amperage. Consulting a licensed electrician ensures your setup is safe, reliable, and ready to fire up your creativity.
Conclusion
Starting your home pottery studio is an exciting journey that combines passion with creativity. Did you know that the pottery market is expected to grow by 6% annually over the next five years? With the right space, tools, and dedication, you can turn your hobby into a thriving business or simply enjoy making beautiful pieces for yourself. Immerse yourself, stay inspired, and watch your skills—and your studio—grow beyond what you imagined.

Born in Dubai to Pakistani parents, Aisha deeply understands Middle Eastern and South Asian luxury markets. She excels in forging strategic partnerships with top-tier luxury brands worldwide, fostering cross-cultural collaborations that enhance our global presence.